Best sonar settings for finding structure on Lake Champlain
Ever feel like you’re just driving around aimlessly on Lake Champlain, staring at a sonar screen that looks more like abstract art than a map to fish? It’s a common frustration for even seasoned anglers. Without the right sonar settings, that incredibly powerful piece of technology on your boat can be practically useless for finding the vital structure that holds big fish. This guide is here to demystify those complex settings, helping you tune your fish finder to reveal the hidden ledges, rock piles, and humps of Lake Champlain with crystal clarity.
Understanding Sonar Basics for Structure on Lake Champlain
Before we dive into tweaking dials and menus, let's get a handle on the fundamentals. Lake Champlain is a massive, diverse body of water, and understanding how your sonar interacts with its depths and contours is the first step to unlocking its secrets.
The Fundamental Principles of Sonar
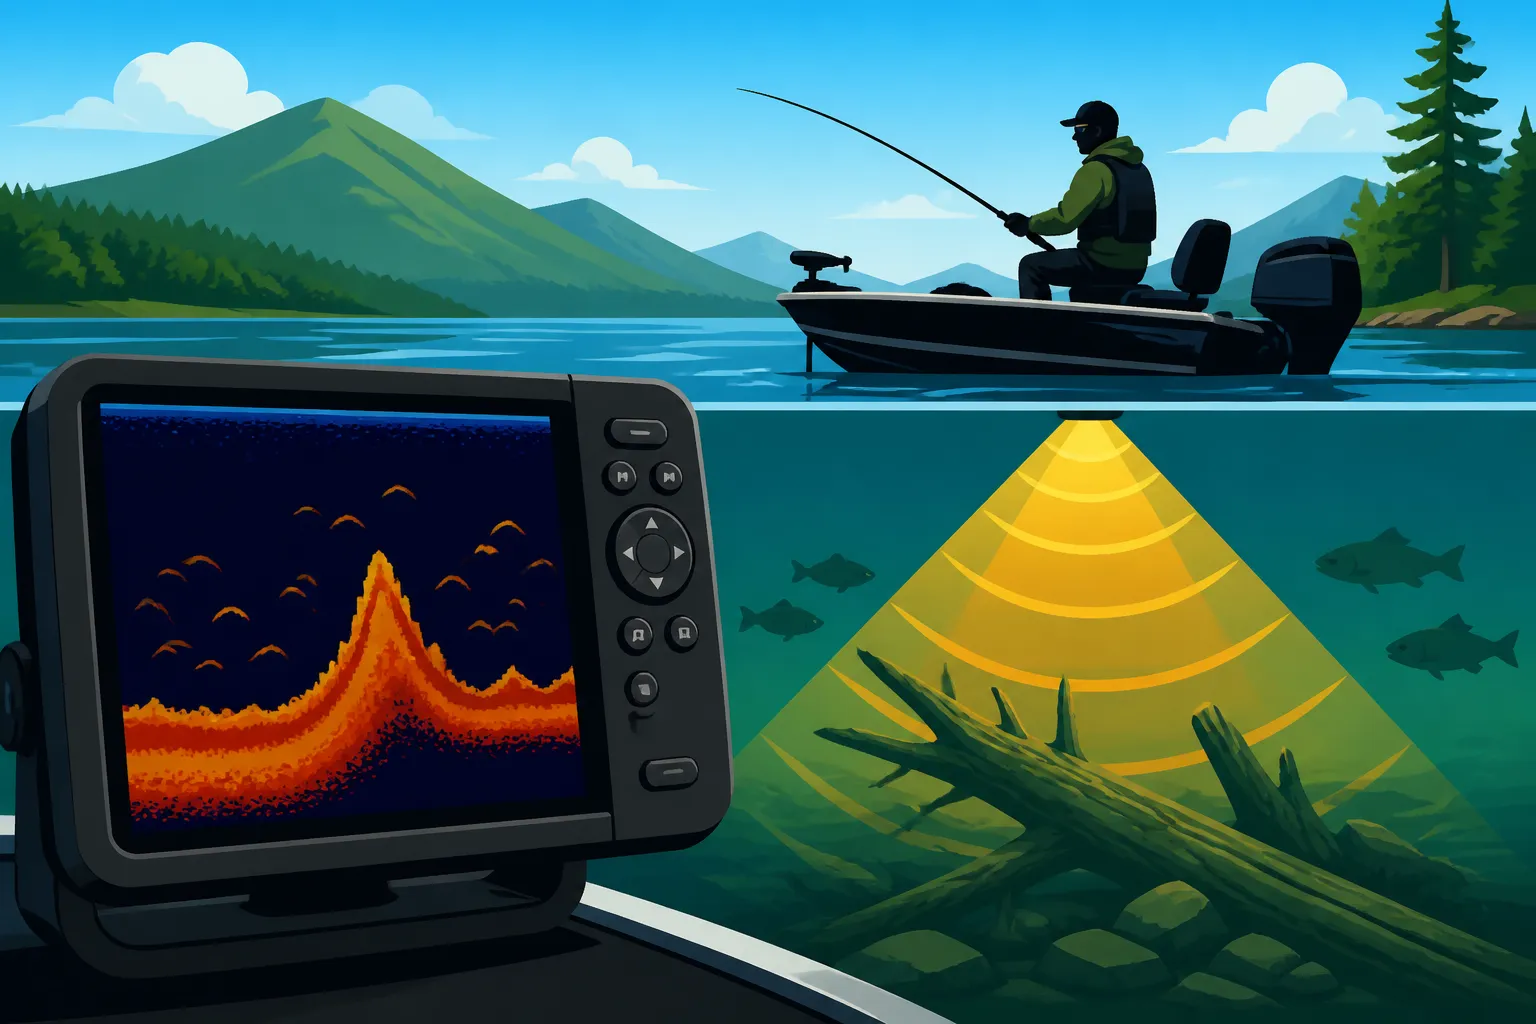
At its core, sonar works by sending out sound waves and listening for their echoes. Your transducer emits these pings, and when they strike something – a fish, the lake bottom, a submerged log – they bounce back. Your fish finder then interprets these echoes, translating them into the images you see on screen. It’s like yelling into a cave and listening for how long it takes for the sound to return and what kind of echo it makes.
There are a few key types of sonar technology that anglers rely on for structure identification. Standard 2D sonar gives you a traditional arch-like display for fish and a representation of the bottom. However, for truly picking apart structure, Down Imaging and Side Imaging (sometimes called Side Scanning) are absolute game-changers. Down Imaging provides a picture-like view directly beneath your boat, making it much easier to differentiate between a cluster of baitfish and a gnarly brush pile. Side Imaging, on the other hand, broadcasts sound waves out to the sides of your boat, painting a wide swath of the bottom. This allows you to literally "see" ledges, rock fields, or even sunken boats off to your port or starboard, dramatically increasing your search efficiency on a vast lake.
Why Structure Matters on a Big Lake
Lake Champlain is an ecological marvel, spanning over 120 miles and boasting incredible depth variations. From the shallow, fertile bays of Missisquoi Bay to the deep, rocky expanses of the main lake near Juniper Island, the terrain beneath the surface is incredibly varied. For fish like walleye, smallmouth bass, lake trout, and even northern pike, structure isn't just a preference; it's a necessity. It offers protection from predators, ambush points for feeding, and crucial changes in depth or bottom composition that attract baitfish.
Imagine a vast, flat desert. Where would you expect to find life? Around the oases, the rocky outcrops, or the sparse patches of vegetation. It’s the same underwater. Without structure, fish are exposed and vulnerable. A sudden drop-off, a submerged reef, or a cluster of boulders can create current breaks, temperature changes, or concentrations of forage that act as magnets for fish. Trying to find fish in this immense body of water without first identifying their preferred structure is akin to searching for a needle in a haystack – you'll be spending a lot of time and fuel without much to show for it. Our Lake Champlain Fishing Guide delves deeper into the specific areas that hold different species.
Optimizing Your Frequency and Cone Angle for Lake Champlain's Depths
Once you understand the basics, the next critical step is to configure your sonar's frequency and cone angle. These settings dictate how wide and how deep your sonar can "see," making them crucial for effectively scanning the varied underwater landscape of Lake Champlain.
Choosing the Right Frequency
Think of sonar frequencies like different wavelengths of light. Some are better for seeing fine details up close, while others can penetrate further but with less clarity. Your fish finder likely offers a range of frequencies, and knowing when to use which is key.
- High Frequencies (e.g., 200 kHz, Mega Imaging): Higher frequencies provide fantastic detail and resolution. If you're fishing in shallower water, say 30 feet or less, or trying to pinpoint individual fish or subtle bottom features, a higher frequency like 200 kHz is usually your best bet. Modern high-resolution imaging, often referred to by brand names like Garmin's ClearVü or Humminbird's MEGA Imaging, operates on very high frequencies (hundreds of kilohertz to over a megahertz) to deliver incredibly detailed, photographic-like images of structure and fish directly below or to the sides of your boat. These are excellent for examining specific ledges or rock piles once you've found them.
- Low Frequencies (e.g., 50 kHz, 83 kHz): For the deeper sections of Lake Champlain, like those areas where you might be targeting lake trout, lower frequencies are essential. They penetrate deeper into the water column and are less affected by absorption or noise. The trade-off is a reduction in detail compared to higher frequencies. If you're searching for deep structure or surveying large, deep areas, switching to a lower frequency will give you a broader, though less sharp, view. Many units allow for dual-frequency operation, letting you see both a wide, deep view and a more detailed, shallower view simultaneously.
- CHIRP Sonar: Many contemporary fish finders, including popular models found on Amazon, utilize CHIRP (Compressed High-Intensity Radiated Pulse) technology. Instead of sending out a single frequency, CHIRP sonar transmits a continuous sweep of frequencies. This broadens the amount of information the transducer receives, allowing the unit to process and display much clearer, more defined images. CHIRP can differentiate between individual fish and bait balls, reveal structure with incredible sharpness, and perform well in both shallow and deep water. It often combines the benefits of both high and low frequencies into a superior overall image.
Understanding Cone Angle and Coverage
The cone angle refers to the width of the sonar beam as it travels through the water. Imagine a flashlight beam widening as it gets further from the source; sonar beams do the same.
- Wider Cone Angles: A wider cone angle covers a larger area of the bottom, which is great for initially searching for structure over a broad expanse. In shallower water, a wide cone can give you a comprehensive picture of the immediate area around and beneath your boat. However, as the water gets deeper, that wide cone spreads out significantly, scattering the sound energy and reducing the detail and accuracy of the returns. You might see a "fish arch" in deep water, but it could represent a fish many feet away from directly under your boat.
- Narrow Cone Angles: A narrower cone angle concentrates the sound energy into a tighter beam. This provides much greater detail and target separation directly beneath your boat, even in deeper water. While it covers a smaller area, it gives you a more precise reading. Anglers often switch to a narrower cone (or a higher frequency which naturally has a narrower effective cone) when they've located promising structure and want to examine it closely. This helps identify the exact contours of a rock pile or the subtle differences in a drop-off where fish might be holding.
For example, when you're cruising Lake Champlain trying to locate potential walleye haunts, a wider cone or a CHIRP frequency that offers good wide coverage might be ideal for scouting. Once you spot something interesting, like a potential hump or rock field where walleye are known to hold (as discussed in Walleye Fishing on Lake Champlain), you might then slow down and switch to a narrower, more detailed frequency to precisely examine the structure and confirm the presence of fish.
Adjusting Sensitivity, Gain, and Color Palette for Clarity
Even with the right frequency and cone angle, your sonar picture can be murky or misleading if your sensitivity, gain, and color settings aren't dialed in. These adjustments are crucial for stripping away clutter and highlighting the true echoes of fish and structure.
Dialing in Sensitivity and Gain
This is where many anglers get tripped up, and it's perhaps the most important adjustment you can make for a clear picture. Sensitivity (often called "Gain" on some units) controls how much detail your sonar unit displays by adjusting how strongly it "hears" echoes returning from the water.
- Too Low: If your sensitivity is set too low, your sonar won't pick up faint echoes. This means you could be missing smaller fish, schools of baitfish, or subtle changes in bottom composition like soft mud versus hard gravel. Your screen might look clean, but it's likely hiding a lot of valuable information. You'd essentially be deaf to whispers underwater.
- Too High: Conversely, if your sensitivity is too high, your screen will be full of clutter and noise. You'll see surface clutter (echoes from the surface, prop wash, or even air bubbles), thermoclines (layers of water at different temperatures), and even small suspended particles, making it incredibly difficult to distinguish actual fish or structure from the "noise." It's like trying to have a conversation in a crowded, noisy room.
The sweet spot is usually found by starting with a relatively high sensitivity setting and then gradually reducing it until the surface clutter just disappears or becomes manageable, and the bottom line is clear and distinct. You want to see detail without excessive noise. Different conditions on Lake Champlain – like calm vs. choppy water, or areas with more suspended sediment – will require slight adjustments to this setting. Don't be afraid to constantly tweak it as conditions change; it's not a set-it-and-forget-it control. When trying to find those elusive smallmouth bass, as detailed in our guide on Smallmouth Bass Fishing in Vermont, having this dialed in can make all the difference in seeing them hugging a rocky bottom.
Interpreting the Color Palette
Modern fish finders offer a variety of color palettes, and understanding how they work can significantly improve your ability to interpret what you're seeing. Each color represents a different strength of the sonar return.
- Stronger Returns = Brighter Colors: Generally, brighter, more intense, or "hotter" colors (like red, orange, yellow) indicate stronger echoes. These strong echoes typically come from hard objects like rock bottoms, dense schools of fish, or large individual fish.
- Weaker Returns = Softer Colors: Softer, cooler colors (like blue, green, purple) typically represent weaker echoes. These might come from softer bottoms (mud, silt), sparse baitfish, or the edges of structure where the signal is less direct.
Experiment with different color palettes on your unit to find one that is most visually comfortable for you and best highlights the distinctions you need to see. Some anglers prefer palettes with high contrast for easily identifying fish arches and hard bottom, while others like more subtle palettes that show fine changes in bottom composition. For instance, being able to distinguish a hard rock bottom from a soft, silty area can tell you a lot about where different species might be foraging. Many of the best fish finders for Vermont lakes will offer a range of palettes to choose from. Consider checking out user reviews and tutorials on Amazon for tips on which palettes are most effective for various conditions.
Leveraging Advanced Features for Detailed Structure Identification
Beyond the basic settings, modern fish finders come packed with advanced features that can drastically improve your ability to locate and interpret structure on a massive body of water like Lake Champlain. Learning to use these effectively is the difference between guessing and knowing.
Side Imaging and Down Imaging
We touched on these briefly, but they deserve a deeper dive because they truly revolutionize structure fishing.
- Side Imaging/Scanning: This technology sends a razor-thin, high-frequency beam out to both sides of your boat. Instead of just seeing what's directly beneath you, you get a panoramic view of the bottom extending out many feet (or even hundreds of feet, depending on the unit and conditions) to the left and right. This is absolutely invaluable for covering large areas of Lake Champlain quickly. Imagine cruising along a shoreline or over a suspected flat. With Side Imaging, you can spot a hidden rock pile 50 feet to your left, a sunken tree off to your right, or a subtle depth change that 100% conventional 2D sonar would have missed entirely unless you drove directly over it. It literally paints a picture of the underwater terrain, making it easy to identify ledges, boulder fields, distinct contours, and even individual fish away from your boat. Brands like Humminbird and Garmin have excellent Side Imaging/Scanning capabilities that are highly praised by anglers for their clarity.
- Down Imaging/ClearVü: While Side Imaging gives you width, Down Imaging (often called ClearVü or StructureScan by various manufacturers) focuses on providing a photographic-like view directly below your boat. Instead of traditional fish arches, you'll see realistic images of submerged objects. This makes it far easier to differentiate between, say, a cluster of baitfish and a sunken brush pile. You can clearly see individual branches of a tree, the distinct shapes of boulders, or the exact profile of a drop-off. When you've found a promising area with 2D or Side Imaging, switching to Down Imaging can confirm what that structure truly is, allowing you to accurately position your boat for fishing.
Together, Side and Down Imaging turn your fish finder into an underwater scouting machine, giving you an unprecedented understanding of what lies beneath the surface of Lake Champlain. They help confirm what you see on your Best Fish Finders for Vermont Lakes and maximize your time on the water.
Chartplotter Integration and Waypoints
Finding structure is great, but being able to return to it consistently is even better. This is where your sonar's integration with a chartplotter (GPS mapping) system becomes crucial, especially on a vast lake like Champlain.
- Detailed Mapping: Modern fish finders often come with built-in GPS and detailed charts of major waterways, including Lake Champlain. These charts show contours, navigation aids, and sometimes even hot spots. When you're using your sonar to locate new structure, overlaying that information onto your chart is incredibly powerful. You can see precisely where the rock pile you just found sits in relation to a known depth contour or a navigational buoy. This contextual information helps you understand patterns and find similar structure elsewhere on the lake. Many anglers invest in supplemental mapping cards from companies like Navionics or C-MAP, which often provide even more detailed contour lines and bottom composition data. You can often find these enhanced mapping cards and marine GPS units on Amazon.
- Marking Waypoints: The moment your sonar reveals a promising piece of structure, or you see a concentration of fish on that structure (maybe some nice bass during Lake Champlain Smallmouth Bass Fishing), you need to drop a waypoint. A waypoint is simply a GPS marker that records the precise coordinates of that spot. This allows you to:
- Return Accurately: Drive back to the exact location again and again, even days or weeks later.
- Analyze Patterns: Over time, by marking many waypoints, you can begin to see patterns in where fish prefer to hold. Do they prefer north-facing ledges? Humps at a certain depth? You’ll be building your own personal "hotspot" map of Lake Champlain.
- Share with Friends: If you're fishing with buddies, you can easily share waypoints to get them on the fish.
Using your sonar in conjunction with your GPS and religiously marking waypoints is perhaps the most effective strategy for consistent success on Lake Champlain. It transforms random searching into systematic exploration and precise targeting. Knowing these locations can be invaluable, whether you're bringing out your Best Boats for Vermont Lakes and Rivers or just looking for a good shore fishing spot.
Here’s a quick overview of how different sonar frequencies typically perform:
| Sonar Frequency (kHz) | Primary Use Case | Detail/Resolution | Depth Penetration | Beam Angle (General) | Notes |
|---|---|---|---|---|---|
| 50 | Deepwater searching, offshore, large coverage | Lower | Excellent | Wider | Good for finding large schools or deep structure, less detail on individual targets. |
| 83 | General deep/mid-depth, wider coverage | Medium | Good | Wider | Good for broad searches, often paired with 200 kHz for dual-frequency. |
| 200 | Shallow to mid-depth detail, target separation | High | Good | Narrower | Excellent for identifying fish arches, bottom composition in shallower water. |
| 455/800 | Down/Side Imaging (High Res) | Very High | Shallow to mid | Fan-shaped | Photographic-like images of structure and fish, not traditional 2D sonar. |
| MEGA (1.2 MHz+) | Ultra High-Res Down/Side Imaging | Extremely High | Very Shallow | Ultra Fan-shaped | Unparalleled clarity in very shallow water, typically less than 100 feet. |
| CHIRP (variable) | All-around, excellent target separation & detail | Excellent (varied) | Excellent (varied) | Variable | Best of both worlds, sweeps multiple frequencies for superior clarity. |
Remember, these are general guidelines, and the actual performance can vary based on your specific unit, transducer quality, and water conditions. But understanding these core differences will empower you to make smarter choices on the water.
Disclaimer
This article is for general informational purposes only and does not constitute professional advice. Laws, prices and regulations vary by location and change over time. Consult a qualified professional for guidance on your specific situation.