Best kayak anchor trolley system
There's nothing quite as frustrating as finally spotting that perfect drop-off or weed line from your kayak, only to have the wind or current relentlessly push you off course just as you're about to make your cast. In Vermont's beautiful, yet often breezy, lakes and flowing rivers, maintaining your position can feel like an impossible battle. This guide is all about giving you back control: we're going to dive deep into the best kayak anchor trolley systems, explaining what they are, why every Vermont kayak angler needs one, and how to choose and install the perfect setup so you can hold your spot confidently and fish more effectively.
Why an Anchor Trolley System is a Kayak Angler's Best Friend in Vermont
Imagine this: you've paddled out onto Lake Bomoseen on a slightly blustery day, or you're trying to work a seam on the Otter Creek, and you keep getting pushed around. It’s not just annoying; it directly impacts your ability to present your bait properly, feel subtle bites, and ultimately, catch fish. An anchor trolley system is the elegant solution to this very real problem, transforming your kayak from a floating leaf into a stable fishing platform.
Battling Wind and Current on Vermont Lakes and Rivers
Vermont's waterways are diverse, from the wide expanses of Lake Champlain to the winding currents of the Winooski River. Each presents its own challenges. A gentle breeze on a smaller pond can feel like a gale on a big lake, making it impossible to stay put. River currents, even seemingly slow ones, will tug at your kayak relentlessly, pulling you away from prime fishing structure or that crucial ambush point you spent ages finding.
Without an anchor trolley, you'd have to physically move your anchor line from the bow to the stern (or vice-versa) every time you wanted to change the direction your kayak faced. This is not just inconvenient; it's practically impossible to do safely and efficiently while on the water, especially if you're trying to manage a rod and reel at the same time. The trolley system puts all that control right at your fingertips, allowing you to quickly adjust your anchor point without ever leaving your seat. This means more time fishing and less time fighting the elements.
Precision Positioning for Targeting Fish and Structure
Kayak fishing thrives on stealth and precision. Whether you're casting to submerged timber for largemouth bass on a quiet pond or trying to hit a specific current break for trout in a river, being able to precisely control your angle to the target is paramount. An anchor trolley lets you do just that.
Let's say you've found a promising weed bed on Lake Dunmore. With your anchor dropped, you can use the trolley to move the anchor attachment point from the bow, around your kayak, and to the stern, essentially swinging your kayak around the anchor point. This allows you to fan-cast an entire area without repositioning your anchor or paddling endlessly. You can angle yourself perfectly to cast downwind, across a current, or into a tight pocket of cover. This level of control opens up new fishing opportunities that would be impossible with a fixed anchor point. It’s like having a miniature, silent trolling motor for subtle adjustments, but without the battery drain.
Safety and Convenience on the Water
Beyond the obvious fishing benefits, an anchor trolley significantly enhances your safety and convenience. Imagine hooking into a big Muskellunge Fishing on Lake Memphremagog and needing to get your anchor line out of the way quickly. With a trolley, you can easily release your anchor (often using a quick-release cleat) and drift with the fish, preventing it from getting tangled or pulling you into hazards.
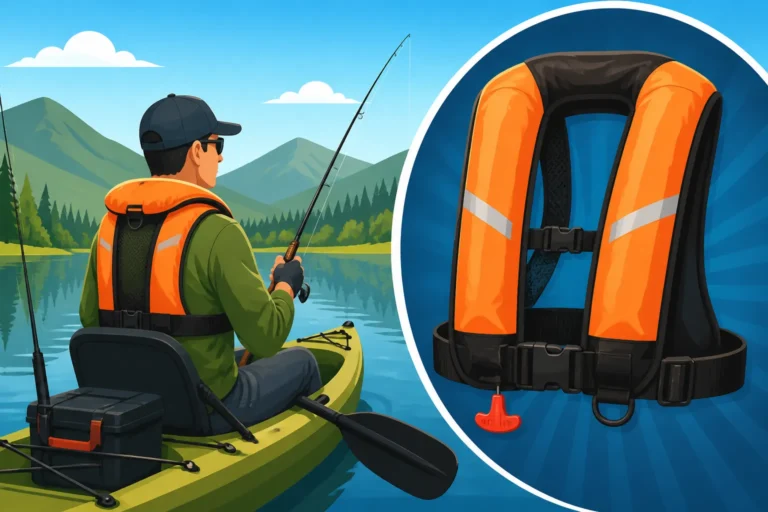
Moreover, having your anchor line managed neatly along the side of your kayak, instead of draped haphazardly, reduces clutter and the risk of snagging your line or paddle. It keeps the anchor readily accessible for deployment and retrieval, and, perhaps most importantly, it means you're never reaching outside the perimeter of your boat to manage your anchor, which can be unstable and dangerous, especially in choppy conditions or strong currents. For many, it's just as important as having a reliable Best Life Jacket for Lake Kayak Fishing.
Understanding the Components of a Kayak Anchor Trolley System
Before you dive into installation, it's really helpful to understand the individual pieces that make up an anchor trolley. While the concept is simple, the quality and type of components can make a big difference in performance and durability, especially when facing the rigors of Vermont’s fishing season.
The Rope, Ring, and Cleat: Core Essentials
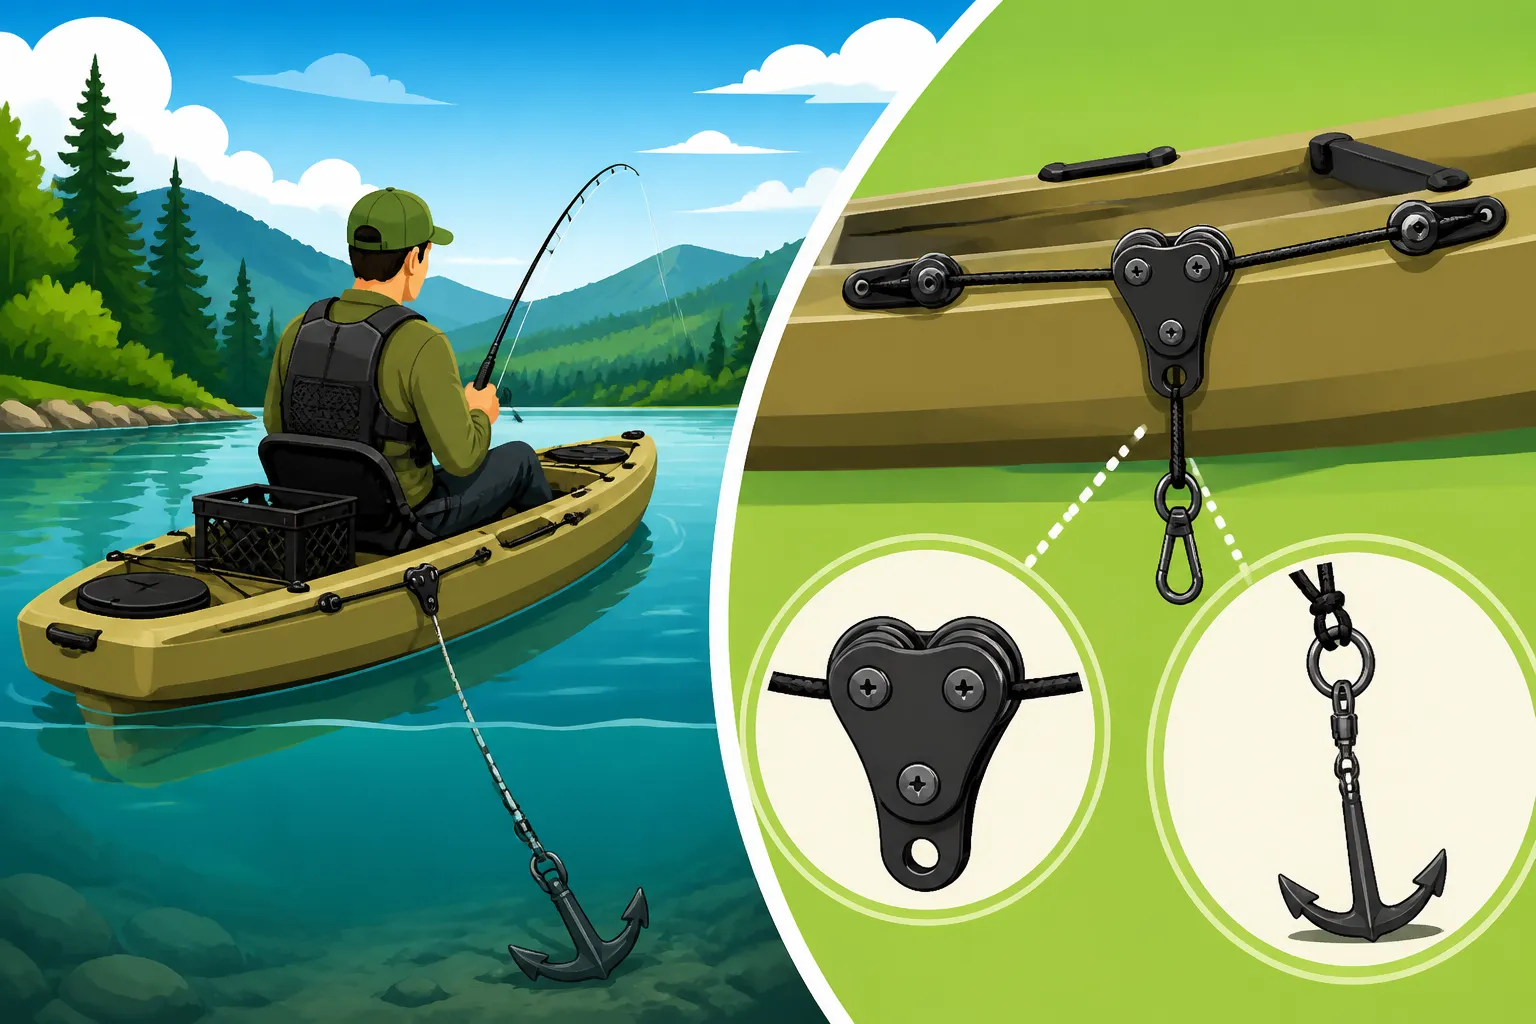
At its heart, an anchor trolley is a loop of rope that runs along the length of your kayak, with a ring that slides freely along that rope. Your anchor line attaches to this ring.
- Trolley Rope: This is the main loop that runs along your kayak. It needs to be durable, UV-resistant, and relatively thin to glide smoothly through pulleys, but strong enough to handle the stress of an anchored kayak. Braided nylon or polypropylene are common choices.
- Anchor Ring: This is typically a metal ring (stainless steel is best for corrosion resistance) or a heavy-duty plastic ring that connects your actual anchor line to the trolley rope. Its job is to slide effortlessly along the trolley rope, allowing you to change your anchor's position.
- Cleat: A small, low-profile cleat is installed somewhere within easy reach of your cockpit – usually near your hip. This is where you'll tie off or "cleat" the trolley rope after you've moved the anchor ring to your desired position. Some systems use a Z-cleat or similar cam cleat for quick, one-handed adjustments, which is a fantastic upgrade for convenience.
Pulleys, Pad Eyes, and Z-Cleats: Customization Options
While the basic components get the job done, adding a few specialized pieces can significantly enhance your trolley's functionality.
- Pulleys: These are crucial. Two pulleys are typically installed at the bow and stern of your kayak, guiding the trolley rope smoothly. Good quality pulleys with stainless steel sheaves will reduce friction, make the system easier to operate, and prolong the life of your rope. If you've ever struggled with a sticky trolley, chances are the pulleys were the culprit. Many kits, like those you might find on Amazon or at Bass Pro Shops, come with these included, but upgrading to higher-quality marine-grade pulleys is often a wise investment for long-term smooth operation.
- Pad Eyes: These are small, usually plastic or nylon, loops that screw or rivet into your kayak's hull. They serve as guides to keep the trolley rope neatly against the side of your kayak, preventing it from flapping around or getting in the way of your paddling or fishing. You'll typically use several of these spaced along the length of your kayak.
- Z-Cleats or Cam Cleats: These are more advanced alternatives to a standard cleat. A Z-cleat allows you to quickly secure and release the trolley rope with one hand, simply by pulling the rope in or out. A cam cleat works similarly, gripping the rope with spring-loaded teeth. Both offer superior speed and ease of adjustment compared to tying off a traditional cleat, which can be invaluable when the action is hot or conditions are changing rapidly.
Choosing the Right Anchor for Your Vermont Needs
An anchor trolley is only as good as the anchor you pair it with! Vermont offers a variety of fishing environments, and your anchor choice should reflect that.
| Anchor Type | Ideal Vermont Environment | Pros | Cons |
|---|---|---|---|
| Grapnel Anchor | Rocky bottoms, submerged wood, weeds | Folds up compactly, good grip on hard stuff | Can get snagged easily, less effective on soft mud |
| Fluke Anchor | Soft bottoms, sand, mud (Lake Champlain) | Excellent holding power in soft material | Bulky, can drag in strong current on hard bottoms |
| Mushroom Anchor | Very soft mud, calm water, temporary | Simple, won't snag easily | Poor holding power in current or wind, very heavy |
| Drag Chain | Slow current, river sections | Minimal snagging, good for slow drifts | Not a true anchor, limited holding in strong current |
For most Vermont kayak anglers, a 1.5-3 lb grapnel anchor is a versatile choice, especially if you add a short length of chain (about 3-6 feet) between the anchor and your anchor line. This chain helps the anchor lay flat and dig in better, significantly improving its holding power. The weight of your anchor will depend on your kayak's size, your weight, and the typical currents and winds you face. For example, a bigger kayak like the ones people use for Lake Champlain Fishing Guide might need a heavier anchor than a smaller river kayak.
Step-by-Step Installation Guide for Your Anchor Trolley
Installing an anchor trolley system might seem daunting at first, especially if you're hesitant to drill holes in your beloved kayak. But trust me, it’s a straightforward process, and with a little patience and the right tools, you’ll have it dialed in. Many kits come with instructions, but these general steps apply to most setups.
Planning Your Layout: Bow to Stern or Side Mount?
The most common and effective anchor trolley runs from bow to stern, along one side of your kayak. This allows you to position your anchor anywhere along the entire length of your boat.
- Identify the "Working Side": Most people choose to install their trolley on the side opposite their dominant casting arm, or on the side where they typically deploy other gear. For instance, if you cast right-handed, you might prefer the trolley on your left side to keep your casting arm clear.
- Consider Obstructions: Look for existing rod holders, gear tracks, paddle keepers, or accessory mounting points that might interfere with the trolley rope or components. You want a clear path from bow to stern.
- Component Placement: The two pulleys will go as close to the bow and stern as possible, ideally at the very tips of the kayak’s side. The cleat or Z-cleat should be within easy arm's reach while you're seated comfortably in your paddling position, typically just forward of your hip. The pad eyes will be spaced evenly between the pulleys and the cleat, ensuring the rope stays snug against the hull.
Drilling and Attaching Components Safely
This is where the rubber meets the road! Take your time, measure twice, and drill once.
- Mark Your Spots: Using a fine-point marker, carefully mark the exact locations for your pulleys, pad eyes, and cleat. Hold each component in place to ensure proper alignment and a clear path for the rope.
- Pilot Holes: For screws, always drill pilot holes that are slightly smaller than the screw diameter. This prevents cracking the plastic and ensures a secure fit. If your kayak uses rivets, drill the appropriate size hole for the rivet.
- Seal It Up: This is crucial! After drilling each hole, apply a marine-grade sealant (like marine silicone or a product like Goo Gone Marine) to the screw threads or rivet stem before inserting and tightening the component. This creates a watertight seal, preventing leaks into your hull. Don't skip this step!
- Attach Components: Securely attach all your pulleys, pad eyes, and the cleat. Don't overtighten screws, as this can strip the plastic. Ensure pulleys spin freely and the cleat is firmly mounted. If you're using rivets, a rivet gun will be necessary.
Rigging the Rope and Testing the System
Once all your hardware is mounted, it’s time to string the trolley.
- Thread the Rope: Start by feeding one end of your trolley rope through one pulley, then through the anchor ring, and then through the other pulley.
- Run Through Pad Eyes: Now, feed the rope through all the installed pad eyes, making sure it sits snugly along the side of the kayak.
- Form the Loop: Bring the two ends of the rope together near your cleat. Tie them off using a secure knot, like a double fisherman's bend or a triple surgeon's knot, ensuring the loop is tight but not so tight that the anchor ring can't slide easily. Trim any excess rope and melt the ends with a lighter to prevent fraying.
- Test It Out: Before you hit the water, thoroughly test your system. Grab the anchor ring and slide it from bow to stern repeatedly. It should move smoothly without catching. Practice cleating off the rope. Attach your actual anchor to the ring (on land!) and visualize how it will work when deployed.
Tips for Maximizing Your Anchor Trolley's Effectiveness in Vermont
Having a trolley installed is one thing, but truly mastering its use will elevate your kayak fishing experience. Like learning the nuances of How to Catch Smallmouth Bass in Vermont Lakes, it takes practice!
Mastering Anchor Deployment and Retrieval
Efficiency is key when dealing with anchors and currents.
- Controlled Drop: Don't just toss your anchor. Lower it gently to avoid spooking fish. Once it hits bottom, pay out a little extra line – usually a 3:1 or even 5:1 scope (ratio of anchor line to water depth) is ideal for a good hold, especially in wind or current.
- Anchor Management: Keep your anchor line organized. Many anglers use a small anchor bag or a "cleat on a rope" system to manage the excess line, preventing tangles. Others use a dedicated anchor line spool. You can find options for these at places like Bass Pro Shops.
- Retrieval Technique: Pull up your anchor slowly and steadily. If it's snagged, try changing your angle slightly with the trolley and pulling from a different direction. Never pull directly upwards if it's deeply snagged; you risk flipping your kayak or snapping your line. If you fish a lot of rocky areas, consider an anchor retrieval ring system that allows you to pull the anchor free from the crown, essentially pulling it out backward.
Combining Your Trolley with Other Positioning Tools
Your anchor trolley is fantastic, but it plays even better with other gear.
- Drift Sock/Drogue: For larger lakes or windy conditions where you want to slow your drift without fully anchoring, a drift sock is invaluable. You can even attach your drift sock to the anchor trolley ring, allowing you to position your drift sock at the bow or stern to control your drift direction. This is particularly useful when targeting species like walleye on Lake Champlain Walleye Fishing, where a slow, controlled drift can be highly effective.
- Paddle Clip/Holder: Keep your paddle secured while fishing so it's not rattling around or, worse, drifting away. Many kayaks have built-in paddle clips, or you can add aftermarket ones. This leaves both hands free for fishing and anchor management.
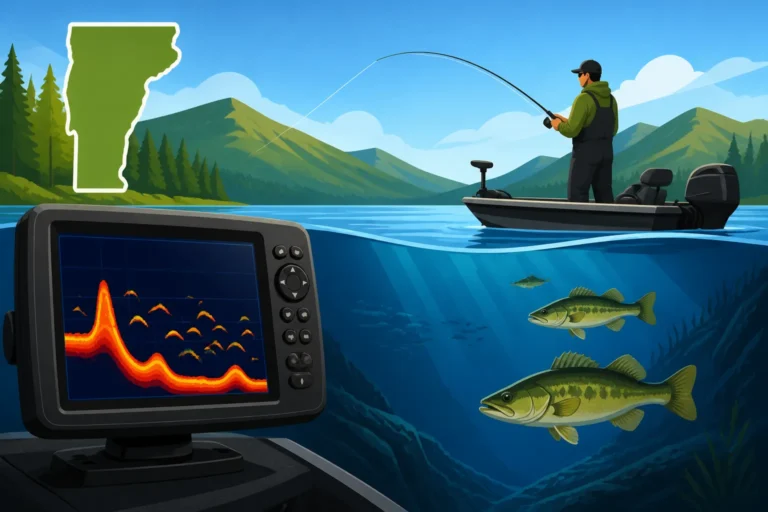
- Fish Finder Integration: If you're using a Best Fish Finders for Vermont Lakes, your anchor trolley helps you stay put right over that structure or school of fish you've marked. Use your fish finder to locate the sweet spot, deploy your anchor, and then fine-tune your position with the trolley.
Maintenance and Troubleshooting Common Issues
Like any piece of outdoor gear, your anchor trolley benefits from a little TLC.
- Rinse After Use: Always rinse your trolley system with fresh water after each outing, especially if you've been in saltwater (though less common in Vermont, some brackish areas exist). This prevents salt and grime buildup and extends component life.
- Check for Wear: Periodically inspect your trolley rope for fraying and your pulleys for smooth operation. Replace worn components as needed. Frayed rope can snap at the worst moment, and sticky pulleys defeat the purpose of the system.
- Common Issue: Rope Snagging: If your rope is snagging, check the pad eyes and pulleys. Are they aligned? Is there something loose on your kayak catching the rope? Sometimes, adding an extra pad eye can help keep the rope tighter against the hull.
- Common Issue: Anchor Not Holding: If your anchor isn't holding, consider increasing your scope (letting out more line), adding a length of chain to your anchor, or trying a different anchor type more suited to the bottom composition. Don't be afraid to experiment with your anchor weight; sometimes a slightly heavier anchor makes all the difference, especially in the currents of the Connecticut River.
With a well-installed and properly maintained kayak anchor trolley system, you’ll unlock a whole new level of control and enjoyment on Vermont’s waters. No more drifting away from the perfect spot, no more struggling against the wind. Just pure, focused fishing.
Disclaimer
This article is for general informational purposes only and does not constitute professional advice. Laws, prices and regulations vary by location and change over time. Consult a qualified professional for guidance on your specific situation.